Introduction to the iPad for Blind and Low Vision Users
What is an iPad?
The iPad is a tablet made by Apple. It is a mobile computing device that lets people access email, the internet, and more on the go or from the comfort of their own couch.
The iPad is a touchscreen device which means that users control it by touching different parts of the screen using various gestures. Note that these devices require bare fingers or specialized gloves.
There are various versions of the iPad. The first iPad was released in 2010 and was followed by the iPad 2 in 2011, iPad 3 in 2012, iPad 4 in 2012, iPad mini in 2012, iPad mini 2 in 2013, iPad mini 3 in 2014, iPad mini 4 in 2015, iPad Air in 2013, iPad Air 2 in 2014, and the iPad Pro in 2015. With each generation, the iPad has generally gotten faster, lighter, and has had a larger display. The iPad mini is a smaller version of the iPad. The iPad Air is thinner and lighter than the original iPad models and offers a larger display. The iPad Pro has the largest display of any iPad to date.
All iPads run iOS which is the mobile operating system developed by Apple. iOS is also the operating system for iPhone and iPod. iOS is now on its ninth iteration with iOS 9.
Various Versions of the iPad
Tour of the iPad Controls
Shape and Size
The iPad is a rectangle. The back is slightly rounded and the front screen is flat and slick1.
The Home Button
On the front screen, the home button is a small, circular depression users will find along the front edge of the screen. The Home Button might be the most important control on the iPad as it helps users navigate the iPad, activate VoiceOver mode, use Siri, and more.
To find the Home Button, users may simply trace a thumb along the edge of the iPad screen. They’ll find the Home Button in the middle of the edge on one of the shorter sides.
Use the Home Button to navigate back to the home screen of the iPad, wake up the iPad, activate Siri, switch between apps, and turn on accessibility modes like VoiceOver and Zoom.
iPad Home Button
Sleep and Wake Button
The Sleep and Wake Button is located along the outside edge of the iPad on the side opposite of the Home Button. The button is small, rectangular and near the corner.
If a user holds the iPad with two hands in horizontal orientation with their right thumb resting on the home button, they will discover the Sleep and Wake Button along the left edge near the top left corner.
The Sleep and Wake Button will put the iPad into sleep mode which dims the screen and uses less energy. When the iPad is asleep, the button will also wake the iPad. Holding the Sleep and Wake Button down will turn the iPad on or off.
Sleep and Wake Button on the iPad
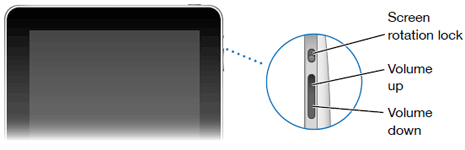
Volume Buttons
The volume buttons let you adjust the volume level of the iPad. These two small, rectangular buttons are found side by side along the outside edge of the iPad.
If a user is holding the iPad with two hands in horizontal orientation with their right thumb on the Home Button, they will find the volume buttons along the outside edge of the iPad along the top of the screen, near the upper left corner. The leftmost volume button increases the volume, and the rightmost volume bottom decreases the volume.
Volume Buttons on the iPad
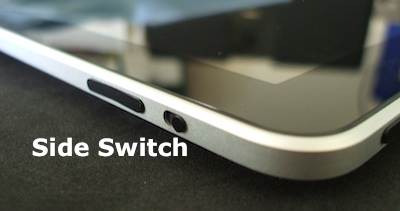
Side Switch Button
This control is no longer present on the most recent iterations of the iPad. On older versions of the iPad, it is sometimes referred to as the Mute and Screen Rotation Switch2.
Which iPads have Side Switch buttons? The iPad Air, iPad 3, iPad 4, iPad mini, iPad mini 2, and iPad mini 3. On these iPads, if the user is holding the iPad with two hands in horizontal orientation with their right thumb on the home button, the Side Switch is on the outside edge of the top side near the top left corner just to the left of the volume controls.
So what does the Side Switch do? The Side Switch is used for one of two purposes: to mute and unmute the iPad or to lock and unlock screen rotation. The newer iPads allow users to change these settings through the Control Center.
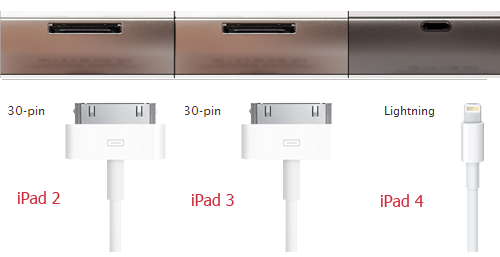
Dock Connector Port
The Dock Connector is how the iPad is charged and connector to other devices. The Dock Connector can be found on the outside edge of the iPad below the home button.
Different iPads have different connector types. Earlier iPads (iPad 1, iPad 2, iPad 3) have a 30-pin dock connection. This connection port is wider than the connection on newer models of iPad and is approximately 1 inch wide.
Newer iPads have the Apple Lightning Connector which is an 8-pin connection. This type of connection is present on the iPad 4, all versions of the iPad Mini, all versions of the iPad Air, and the iPad Pro. This connection is smaller and is approximately half an inch wide.
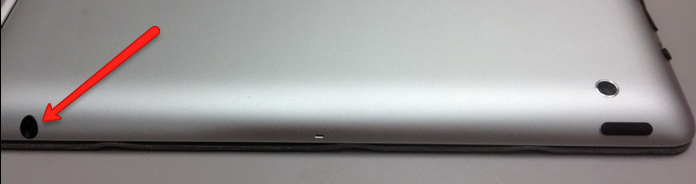
Headphone Jack
The Headphone port is for connecting headphones and other audio devices to the iPad. If a user is holding the iPad with two hands in horizontal orientation with their right thumb on the home button, the headphone port can be found on the outside left edge of the device near the lower left corner.
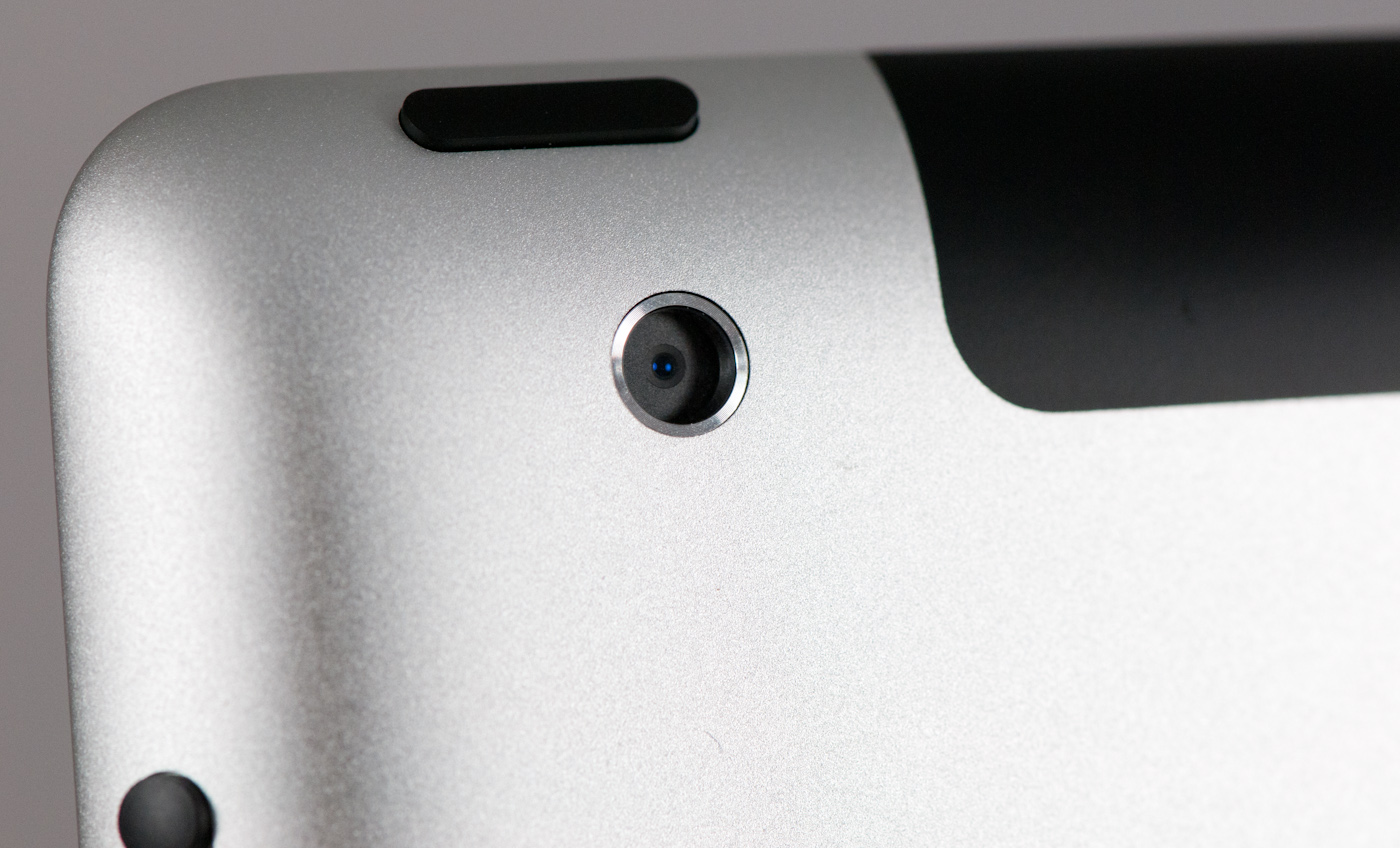
Rear Facing Camera
The Rear Facing Camera is the default camera for the device. It will be used in a range of applications from the iOS Camera app to OCR apps like the knfbReader to magnification apps like VisionAssist and more. The iPad 1 did not have a built-in camera. All later editions of the iPad come with the front and back cameras.
The Rear Facing Camera can be found on the backside of the iPad. If a user is holding the iPad with two hands in horizontal alignment with their right thumb on the home button, they will find the rear facing camera on the backside of the upper left corner. If a user has their left thumb on the sleep and wake button, they’ll find the rear facing camera by sliding their thumb along the backside of the iPad along the top edge. The camera is built into the iPad and cannot be physically distinguished1.
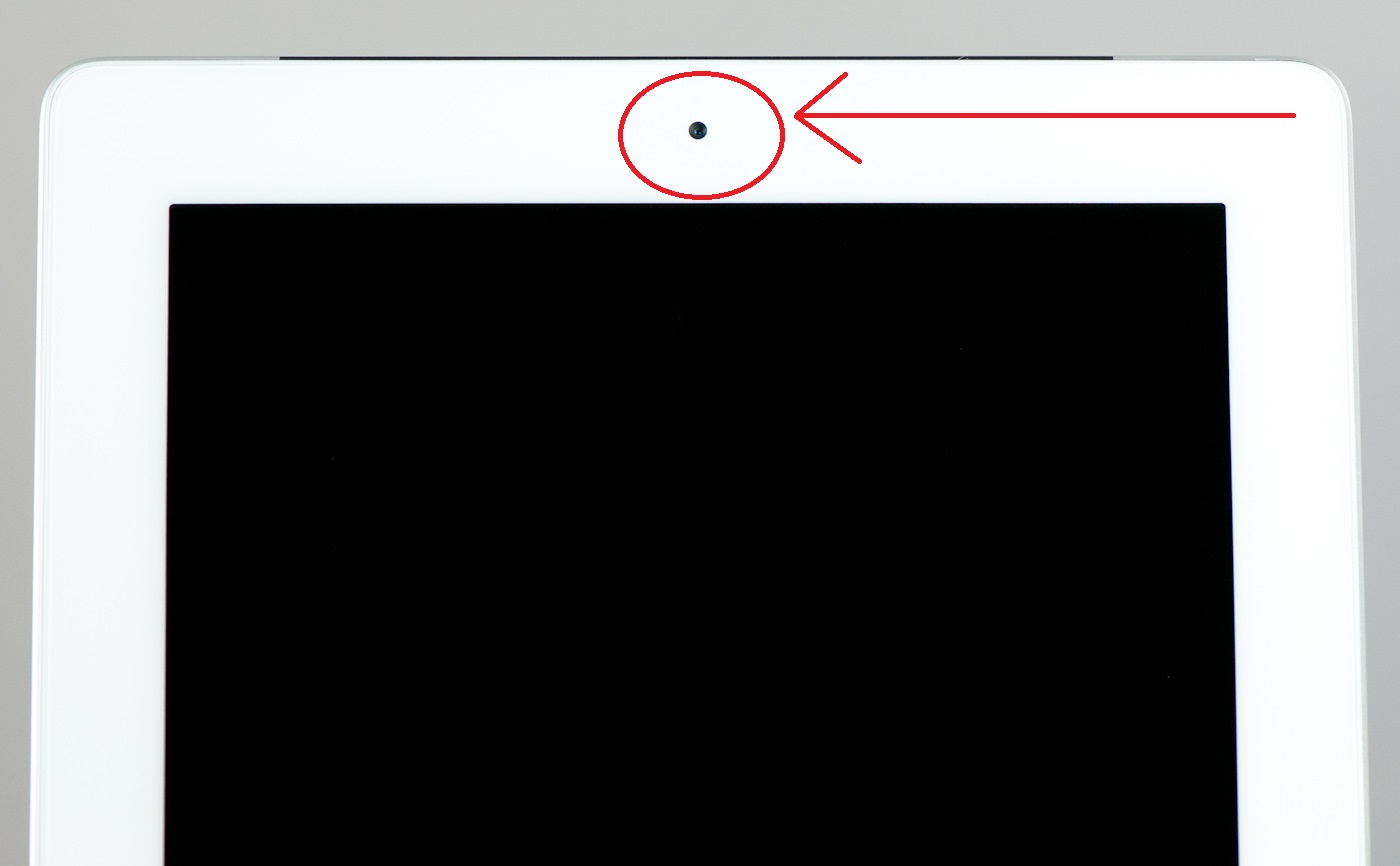
Front Facing Camera
The Front Facing Camera is utilized by several apps, most notably FaceTime. The front camera is small, circular and cannot be physically distinguished as it is built into the iPad1.
If a user is holding the iPad with two hands in horizontal orientation with their right thumb on the home button, they will find the front facing camera in the middle on front left side.
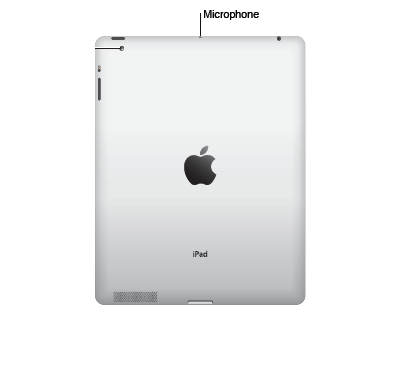
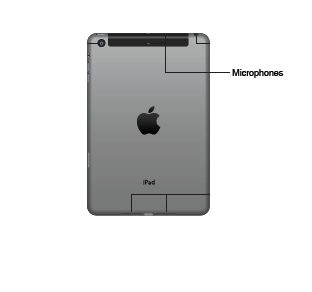
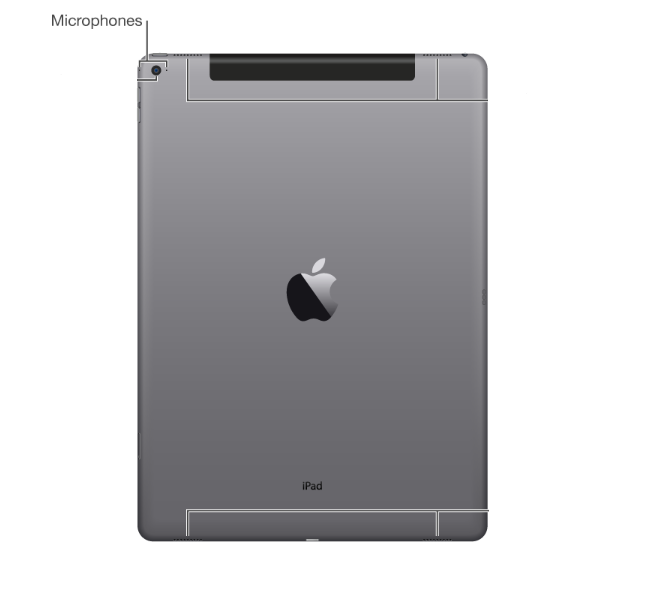
iPad Mics
The location and number of Mics on an iPad vary depending on the version of iPad. Mics are physically indistinguishable, but if the iPad is in a case, there is typically an opening for the mic.
iPad 1 and iPad 2 have a single mic. If a user is holding the iPad with two hands in horizontal orientation with their right thumb on the home button, they’ll find the mic in the middle of the outside edge on the left side.
iPad 3 and 4, iPad mini 1, iPad mini 2, iPad mini 3, and iPad Air have two mics. If a user is holding the iPad with two hands in horizontal orientation with their right thumb on the home button, they’ll find both mics in the middle the left side: one on the outside edge and one on the back.
iPad mini 4, iPad Air 2 and iPad Pro have two mics. If a user is holding the iPad with two hands in horizontal orientation with their right thumb on the home button, they’ll find one along the top edge, to the left of the volume controls. The other mic can be found just below the rear facing camera.
Turning On and Off the iPad
The first thing you’ll need to learn about your iPad is how to turn it on and off.
To turn on the iPad, press and hold the Sleep and Wake button for 3 seconds3.
To turn off the iPad, touch and hold the Sleep and Wake button for 4 seconds until the Power slider appears at top of screen3. For users not working in VoiceOver, simply touch and drag the red arrow to the right. For VoiceOver users, they’ll hear the system say, “Power off button, slide or double tap” and they can simply perform a one finger double tap to turn off the device.
Putting the iPad to Sleep
Putting the iPad to sleep is simple: users simply have to touch the Sleep and Wake button. To wake the iPad up, users can do the same thing. Note that, depending on settings, the passcode will need to input again or users can use Touch ID to unlock their iPad.
iPad Care and Cleaning
“The best way to clean the iPad is by using a dry, soft, lint-free cloth3.”
“There’s no need to scrub the screen very hard, as there is a protective coating on the screen’s surface3.”
Do not use glass cleaners! “According to the iPad user’s guide, you should not use “window cleaners, household cleaners, aerosol sprays, solvents, alcohol, ammonia or abrasives” to clean the screen. Instead, to wipe off any smudges, first, turn off the iPad — the dark screen makes smudges easier to see — and try using your luck with a microfiber cloth or even your sleeve3.”